Showing posts with label Creativity. Show all posts

Wednesday, November 7, 2012

Meaning of Home

living room at morning
Source

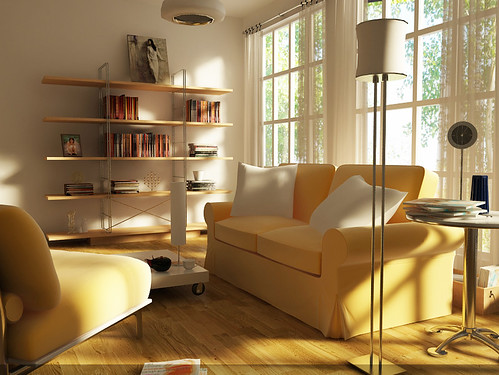
            The boxes and furniture have been delivered to your new home and now set in a chaotic array in each room. In spite of the mess, I see the beauty of potential. My creative mind busily composes images of the arrangements, textiles, and unique pieces that will offer such comfort and attractiveness to these open spaces and blank walls before me. I eagerly wait to add the many touches that will help to transform the generic townhome unit into something much more special- our home.

            Yet, even with all these elements in place a certain depth will remain missing. I could have all the decorative elements and the utmost style in our home, but without the company of friends and family the space will remain empty. The essence of a thriving home is more than the materials that comprise it; it’s the people who join together within that space.

            This notion is not new, and is, in fact, a commonly shared piece of wisdom. However, to some degree “home” remains to have a negative connotation. Home is the place where we can take refuge from the outside world, it’s our coveted storage space for all our dearly held personal belongings, it’s the place we get “stuck” in when we have nowhere else to go or no one with whom to go out. And for some, home is filled with so many unsettling moments or people that associating it as a good in life can be a challenge. With so many poor definitions of “home” existing, creating it into something completely different may seem daunting. It’s not! Each new day is a new opportunity to believe in the potential of home. There is so much depth and meaningfulness that can be instill into our homes!

            My heart for our home is for it to be a place that not only brings comfort to my husband and I, but also to others. Similarly, our space and possessions can serve others just as well as they serve us. In her book Simple Secrets to a Beautiful Home: Creating a Place You and Your Family Will Love Emily Barnes says:

                        Welcome home! That’s what I want my life to say to everyone whose path crosses mine. I want to create an atmosphere of serenity and joy, of blessing and belonging, that embraces people (myself included) and draws them in—an atmosphere that makes them feel loved and special and cared for. (page. 9)

Does this welcome and service require a little more of us? Certainly! Is it worth it? Absolutely! A life and home without welcome and service are regrettably missing something that truly enriches life. It’s not always easy to practice hospitality, especially when it feels like a faded practice among others. Nonetheless, I believe in the beauty of opening the doors of my home to guests and will continue to strive to do so. Think of it this way- could we spare one night each month to invite a family to enjoy dinner, dessert or an activity together? That’s only twelve days out of three hundred sixty five. Sounds a little more possible, right?

            But what if our homes are not decorated exactly like we’d want, or we don’t have the right (or enough) pieces to serve or entertain many guests? Then, take a breath and refocus yourself on the people not the possessions. Your guests are there to spend time with you, not necessarily your things. In fact, when they are there don’t even mention what is not as you’d like or how you’d change it if you could. The true lacking in that case is not of a material matter but a personal one. What is it that makes a less than desirable place one you feel compelled to return to time and again? It’s the content and joyful spirit of the person within the home! Strive to be the kind of person who is so content and so delighted in the company of others that everything else is insignificant.

Finally, what if we viewed our homes belonging more to God than us? Would our possessiveness lessen? Would we be less likely to use it as our hole to hide in? I believe God has a plan for each of us and will provide us with means to achieve that purpose. It’s about Him and His glory! That perspective has really influenced my desires for the meaning of my home and the means by which to achieve it. So as I continue unpack boxes and then decorate our space, I know that even if everything doesn’t come together as I have envisioned God does have it all together still! 


*-*-*-*-*-*-*-*-*-*-*-*-*-*-*-*-*-*-*-*-*-*-*-*-*-*-*-*-*-*-*-*-*-*-*-*-*-*-*-*-*-*-*-*-*-*-*-*-*-*-*-*-*-*-*-*-*-*-


Friday, August 31, 2012

Floral Wreath Tutorial

    Your front door is the first impression of your home and your personality. While some apartment buildings have uniquely styled exteriors, others are rather plain looking. Think about when you're looking at houses or being directed to a house. There are plenty of exterior elements in place to make it more appealing and to set it apart. I'm sure we've all been given the descriptions of "It's the house with (color) shutters" or something of the sort when given directions. An apartment can have that same effect! Your apartment is your home and it certainly doesn't have to be boring. Decorating the exterior gives it some excitement and helps guests easily find which unit is yours apart from all the other identical doors. Simply add a wreath to your door! Purchasing a pre-made wreath may be convenient, but it can also be rather pricey. A fun and affordable alternative is to create your own!
Materials can be shockingly expensive if not bought carefully.  I purchased all my supplies either on sale or with a 40% off coupon (available online) from Hobby Lobby. To make the wreath you will need:

- 2 main floral stems (I chose orange)
- 2 secondary stems of a contrasting color to add interest (I chose cream)
- Grapevine wreath
- floral wire
- wire cutters (I used a tiny pair I have for jewelry)
- (Optional) Bow or letter to place at bottom (not pictured above but included in later pictures)

 1. Cut stems into desired lengths. Lay out how you want the flowers to be arranged on the wreath before you begin. 
  2. Attaching the stems to the wreath by looping a piece of wire within the wreath and stem. Twist to secure in place. Cut the ends of the wire and tuck as much as possible out of sight. Aim to place the wires where leaves or flowers will easily hide them. If necessary, give them a little fluff to encourage them to do so. 
3. Add your secondary stems. Separate the pieces if desired and begin adding them throughout the main flowers. Attach in the same manner as was done previously. 

4. Optional- Attach a letter or bow to the center. I used the wire again, but you could also glue the letter to the wreath. 

The finished wreath! I really enjoy how it turned out and the fun it adds to the entrance of our unit. 

Read Other Posts in the Home Sweet Apartment Series:
*Homemaking While Apartment Living: Part 1, Part 2
*Concepts For Small Space Living

Linked up at: Homemaker By Choice, A Mama's Story, An Original Belle, The Alabaster Jar, The Better Mom, Covered in Grace, Raising Arrows, Time-Warp Wife, Far Above Rubies, Growing Home, A Pause on the Path, Cornerstone Confessions


        -*-*-*-*-*-*-*-*-*-*-*-*-*-*-*-*-*-*-*-*-*-*-*-*-*-*-*-

Saturday, June 16, 2012

Creative Gift Wrapping: Thinking Outside the Roll


     Newspaper can actually provide a creative and fun medium for wrapping gifts. The bow is what really makes the presentation complete (instructions below). I think this style makes a great option for gift wrapping for men, who are generally not as impressed with a lot of frills in presentation. It could also be a frugal way of wrapping if need be. I think the newspaper made a superb gift wrap for this year's Father's Day gift.  

Create a Paper Bow

Wrap gift as normal, but with a sheet of newspaper. Then cut several (12-15) 1" strips of newspaper, and several (12-15) more strips of colored paper 1/2" in width. A sales circular generally provides a more colorful bow to set it apart from the text of the newspaper wrapping. 

Form a ring with the strips.

Bring the back to the front and tape/glue/stable to join. 

Using a needle and thread, pierce the center of each folded strip and begin stacking them while alternating the sales circular pieces and colored paper pieces. 

Use the same colored paper to create a little tag. Finished!

-*-*-*-*-*-*-*-*-*-*-*-*-*-*-*-*-*-*-*-*-*-*-*-*-*-*-*-


Monday, May 16, 2011

Cloth Napkins

       
     I love using cloth napkins! They just add a bit of charm and fun to the meals. Unlike paper napkins, these are reusable which saves me money and decreases waste. Even if multiple napkins are needed throughout the day they add so little to a load of laundry that they are still more economical and ecological than paper products. Plus, they're so cute!
     I wanted enough napkins to have a clean one for everyone each morning to use for the day. For us, that means we needed at least fourteen napkins. Instead of going out and buying premade napkins I decided to make my own. I used Fat Quarters bundles of fabric, which I love for the many exciting patterns and colors. I could also have selected from the remnant section of the fabric department. Napkins require a 16 1/2 inch square piece of fabric, and so I found the Fat Quarters used for quilting to be the easiest. I just cut out the squares and then folded the endes 1/4 inch twice and ironed them down. Then, a quick zig zag stitch on the sewing machine around the border. Ta da! Cloth napkins to match my table setting!

Wednesday, April 13, 2011

Jewerly Board

     I institued this jewerly organizer into my decor years ago when I had to come up with solutions for dorm room space, yet here I am several years later and beyond the dorm days and I've just hung it on the wall in our latest home. haha, I guess it's a "design" keeper. It's not the fanciest thing, but man, is it functional! It certainly holds more "fashion jewerly" than a dainty jewerly box. Plus, it's up off the surface of my dresser or countertops (I'm a fanatic for surfaces being clear).
     To make the organizer, you simply need a cork board and push pins. I prefer to paint the edge so that it looks more like it's framed. I also painted the center to match the bathroom towels and give it some contrast to the white walls. I really like having the shelf underneath to hold the earring stand (which I also painted), so that everything stays together. If space for one larger board is limited, then I've considered using two to three (one for rings, necklaces, bracelets etc) smaller cork boards. 
      These make wonderful gifts to young girls! I've given one for my niece and second cousin. I included a book on making bracelets and some string with one. For both of them I attached a small mirror on one side and painted their names underneath. I think having the name painted on makes it a bit more special for them. I also used funky push pins on theirs whereas for mine I prefer clear ones.  
Related Posts Plugin for WordPress, Blogger...