Pages

Wednesday, September 26, 2012

Homemade Yogurt

       Yogurt is a staple in our home. We use it in snacks, smoothies, breakfast parfaits, and as an ingredient substitution. There are many nutritional benefits to eating yogurt. When comprised of only the two basic components of milk and yogurt starter, you’re getting the nutritional offering of the milk plus the good bacteria found in the yogurt. Yogurt purchased in the stores is often times loaded with preservatives and sugars. There is also the issue of purchasing and throwing away all those plastic cups. My husband and I have since learned how to make a large batch of yogurt for a fraction of the cost. We initially used a slow-cooker method. My slow-cooker tended to get hotter in certain places and would scorch the milk leaving a mess of the milk and pot. So, we moved on from this method to the stovetop method. It does take some time to make yogurt at home. It probably takes me an hour from start to putting it away to culture, but I’m not standing over the pot the entire time. Now, let me show you why it may be worth finding an hour each week:
Cost to Purchase Ingredients: $4.73
Milk: $3.39/gallon & Yogurt starter: $1.34/6oz

Per Batch Cost: $1.07
Milk: $0.85/quart
Yogurt starter: $0.22/oz/2T

Purchased Yogurt: $1.34/6oz container

Unit cost
Homemade: $0.03/oz
Purchased: $0.22/oz

     In summary, we make one quart of yogurt for $1.07! If we purchased the near equivalent in 6oz cups we would need to buy 5-6 packages (@$1.34 each) which would total $6.70-8.04! I don’t know about you, but that’s a big difference for my grocery budget!

     I've found that the key to regularly including certain homemade foods is to make them part of your weekly routine. Pick a day of the week and make a particular food item that day. Keeping granola, breads, and yogurt on hand is much easier when I make making those items a part of life instead of setting aside life to make them. For instance, my hubby makes all our breads for the week on Sundays (he is amazing  at making breads). Finding time to do yogurt is similar. 


Steps:
(Keep in mind we're making only a quart for just my husband and I for a week. If you have a larger family, then adjust the amounts to fit your needs)

You will need: quart jar with lid, thermometer, whisk, 2 pots, 1 qt. milk (whole milk works best), and 2 T plain yogurt with active cultures (we like Chobani brand best). 

The first order of business is to sterilize your jar and lid. Simply place your jar and lid in the larger pot with water and heat to a boil. Allow to boil for a bit and then remove to a towel to cool. 

Next, heat your milk. This step is essentially re-pasteurizing the milk to make sure the only bacteria present to culture are those found in the yogurt starter. Heat the milk to 185˚F, and then hold it here for about 5 minutes. Then, cool the milk to 115˚F.

Add 2 tablespoons of yogurt to your jar. Add 1/2 c. of milk to the jar. Gently shake or stir to combine.  Then, add the remaining milk. This two step process allows your yogurt cultures to slowly rise in temperature to be able to safely tolerate the high temperature of the milk, so don't skip on this step. 

Replace the water in the large pot with as much cold water necessary to bring the temperature of the water to between  
90-100˚F. Place the filled quart jar in the water until submerged.  Leave the pot in the oven with the oven light on overnight to culture, approximately 8-10 hours. 

The next day, you have a quart of cultured yogurt! If you would like you can strain the yogurt at this point to have thicker, Greek-style yogurt with leftover whey or you can leave it as is. Sometimes I strain mine and sometimes I don't. If I'm going to be making a batch of granola then I might strain it to have whey to soak the oats. 

Uses:
     We currently use yogurt in making breakfast parfaits, smoothies (freeze the yogurt in cubes for a better smoothie result), snacks (add a spoonful of fruit preserves or fresh fruit for flavors), and as a partial mayonnaise substitution. My husband detests mayo. so I use half mayo and half yogurt in any recipe that calls for mayo. 

     Using yogurt as a substitution is also a good way to make the grocery budget stretch as it's cost is usually much less than the ingredient it's replacing. You can actually use yogurt in specific proportions in place of butter, oil, sour cream, mayonnaise, cream cheese, and buttermilk! Chobani's website has a lovely infograph conversion table of these substitutions.

*Note: Reviving Homemaking is not an affiliate of Chobani and has not been asked or persuaded in anyway to promote this brand. It's simply a brand that I have been pleased with in my own experience, and therefore wish to share with others. 

Linked up at: 
 
        -*-*-*-*-*-*-*-*-*-*-*-*-*-*-*-*-*-*-*-*-*-*-*-*-*-*-*-


Tuesday, September 25, 2012

Adding Color to White-Walled Rooms


 There have been a couple of times during apartment living in which I've painted the walls (with permission from the complex). In college, I shared an apartment with two other girls and it was so fun painting the rooms colors we agreed upon for the main rooms and then our personal preferences for our bedrooms. At that time, I did a stripe pattern in my bedroom. I had light blue on the top, white in the middle and then brown at the bottom of the wall. My bedding was brown and the entire scheme livened up my small space. Later, I had an apartment of my own. Having the rooms painted helped the space to be comfortable and warm while it was just I that I lived there. Of course, in both situations the fun came to an end when faced with repainting. We did have a good time with friends who joined in the repainting effort though! I enjoyed the colored walls at the time, but I probably wouldn't do it again. Painting walls can be expensive and requires a lot of work! Instead, I've opted for adding color to my space through textiles.


       Textiles such as pillows, curtains, tablecloths and/or napkins, and bedding all serve an important role in setting the tone of a room. One simple change in the material used in any of these decorations instantly transforms a room. They add personality and character to your space that brings you comfort and gives your guests a better idea of who you are. As previously mentioned, one goal in decorating an apartment space is to diminish the innate temporary feeling of the unit to create a more permanent feel. Utilizing fabrics convey the idea that you've embraced the apartment space as your own. It's your home and you've worked to create it to be just that in environment.

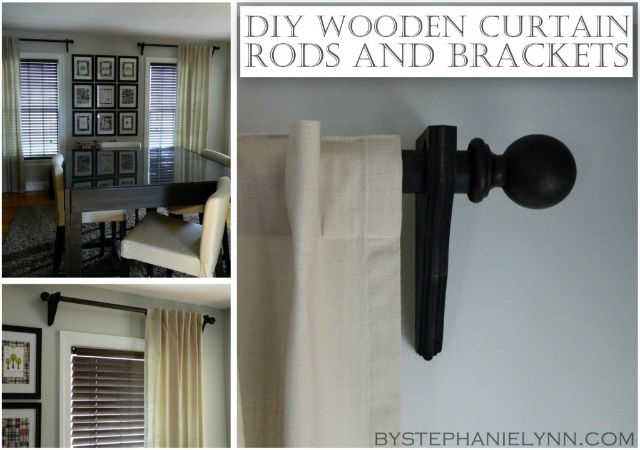
       Including these elements in your décor does not have to be overly expensive. In fact, if you're starting out in marriage and establishing your home environment then the décor budget may be tight. You may even need to work around pieces that were given to you. It isn't entirely necessary to purchase every item at one time. There are a couple of considerations when it comes to adding décor elements to an apartment. Unless you're planning on staying in one unit for years it's wise to take under consideration the flexibility of your selected pieces. For example, It would be quite the disappointment to invest heavily for curtains and rods, and then the next place have a different number of windows. Or, even worse is that the curtains and rods you previously invested in are no longer available to purchase, resulting in unmatched sets in the same room. One solution is to take a do-it-yourself approach. If you are unable to create the item yourself, then there are many sellers on sites like Etsy that can do it. Since they're making it they will likely be able to recreate it later if you need additional pieces. 

A few ideas:
Thomas_Paul_Fabric_curtain_rod_32
Visit House of Hepworths for this tutorial
Visit Under the Table and Dreaming by Stephanie Lynn for this tutorial.  
    
    Orange Dot Pillow CoverRed Pillow CoverCream Pillow Covers
               These pillow covers are available in the Reviving Homemaking Etsy shop

For many more ideas for decorating and organizing your small space, browse my Home Sweet Apartment Board on Pinterest. 

Read Other Posts in the Home Sweet Apartment Series:
*Homemaking While Apartment Living: Part 1Part 2
*Concepts For Small Space Living
*Floral Wreath Tutorial
        -*-*-*-*-*-*-*-*-*-*-*-*-*-*-*-*-*-*-*-*-*-*-*-*-*-*-*-

Monday, September 24, 2012

Menu Plan: Fall (Sept. 23-29)


     So, my homemade "Fritos" excitement last week was short lived. They tasted more like cornbread in chip form, which really wasn't so great. Not surprisingly, I ate the entire batch anyways. haha. Trying new recipes is a bit of a hit or miss game. I still love the challenge of discovering what foods that are assumed to be possible in packaged form only can, in fact, be made homemade. You never know when you might have a hit of a recipe and then be able to expand your meal options or decrease your grocery shopping total because of it!
     This week we have a couple of familiar "hits" recipes, and then some new ones. The main prep work this week will be making the breads and yogurt, and soaking beans in advance. I may make a batch of homemade granola or try a recipe for homemade Grape Nuts cereal. We'll see. A few strategies we used this week for maintaining our budget was:

  • We decided to take advantage of ground meat being on sale by making a big meatloaf and then using it three ways. Buying one main meat and using it in multiple ways has become a favorite way to make things stretch. 
  •  Out of our ten lunches and dinners we try to have five be meatless and five contain meat. This also serves the purpose of compromising between my husband and I's individual food preferences as he likes heavy meat meals and I prefer lighter veggie meals.  
  • My husband (who is amazing at making various types of breads) makes all our breads at the beginning of each week. This week we're using pita pockets and burger buns. 
  • We'll make a meal from soup that was made previously to store in the freezer. This meal was no extra cost this week, and will only require me to thaw the bag and add noodles. Hooray!
     
Breakfasts (Can you tell that this is one meal occasion that we don't mind to stay the same? haha)

-parfaits (yogurt, walnuts, strawberries, granola)
-omelet (eggs,diced bell peppers, diced onions, diced mushrooms), toast, fresh smoothie/juice
-granola cereal with dried berries, banana 
-oatmeal, pear, walnuts
-egg sandwich (egg, cheese, canadian bacon, biscuit)  {Tip: make these in advance and keep them in the freezer)


Lunch
-avocado egg salad sandwiches (Great recipe for this! I'll put it in homemade pita pockets)
-jambalaya (This recipe is delicious! I'm making it with bacon & shrimp this time)
-meatloaf, peas, carrots, mac n' cheese
-sweet potato black bean burgers (on homemade burger buns)

Dinner
-{breakfast for dinner} cheddar cauliflower quiche
-shephards pie (made using leftover meatloaf)
-Greek diner salad (I'm using spring mix lettuce instead of the variety it calls for)
-meatloaf sandwich, steamed broccoli (again, leftover meatloaf)
-chicken noodle soup (already in the freezer! I will just have to thaw and add some cooked noodles.)

Snacks

-fruit (bears, bananas, oranges)
-olives, cheese slices
-yogurt
-veggies (carrots, celery)
-homemade oatmeal raisin cookies (yum, yum, yum!)


Linked up at: Time-Warp Wife, Growing Home, Thankful Homemaker, Cornerstone Confessions, A Mama's Story, The Alabaster Jar, Homestead Revival, Organization Junkie, The Better Mom, What Joy is Mine, The Modest Mom, Covered in Grace, Raising Arrows, Like A Mustard Seed


        -*-*-*-*-*-*-*-*-*-*-*-*-*-*-*-*-*-*-*-*-*-*-*-*-*-*-*-

Friday, September 21, 2012

Five Question Friday


Video Version:
If you are viewing this post via email and cannot see the video, then click here.

Text Version:
1. What is one grammar issue you cannot let go without correction?
    Oh my. I have such a pet peeve of poor grammar. I'm not talking about the more involved elements of grammar. I'm talking about very basic elements of writing such as your/you're, their/there, it's/its etc., subject verb agreements, sentence fragments, incorrect or absent end punctuation, inappropriate use of shorthand, and probably many other examples. \
    With that said, however, I will not correct anyone. When it comes to picking and choosing your battles and building or breaking relationships, proper grammar is such a minor issue. I also want to be one who offers grace. Even if I notice faults in people I try to not point them out and in effect just pick at someone. Goodness, I have have faults of my own after all! 
     (I suppose I didn't answer "one grammar issue," did I? It's all the same to me. haha)

2. What's your favorite thing about fall?
     It's just so cozy! Fall is by far my favorite season. I love the cool days and how they make me want to happily curl up in a warm blanket with some hot cocoa and a good book. I also really enjoy how people are drawn more towards the home and each other without the massive amount of activity that occurs during the summer time. Ah, the delicious tastes of soups and pumpkin flavored everything. How could I neglect witnessing the utmost beauty of changing leaves. It's such a happy time!

3. What's your favourite dish to take to a potluck?
    I don't have a go-to potluck dish. In the past we've tried to bring something that everyone would be familiar with but yet it's different. For instance, instead of standard slaw we made apple fennel slaw and instead of standard sliced bread we brought a loaf of Challah. What we bring to a potluck really depends on the occasion. Whatever it is, though, it will probably involve approaching a familiar dish in a new way. 

4. When do you start Christmas (Holiday) shopping?
     I do a majority of my shopping between the end of November to mid-December. I have definitely learned over the last couple of years about waiting too long. For instance, last year I was looking for clothing for my nieces and nephew. I ran into a lot of difficulty trying to find quality pieces that were stylish and affordable. Things were rather picked over and I was rather pressed for time, so I ended up not getting exactly what I had in mind for them. This year I've kept an eye out all year for potential gifts. I think I purchased the first gift back in June and then the second one was just a couple of weeks ago. I'll probably keep looking and purchasing the more difficult finds up until Christmas. I have a soft spot for my nieces and nephew, so I kind of want to get and do for them what I have in mind. As for the adults, they will be easier to shop for later. I love Amazon wish lists!

5. Did you move homes a lot growing up?
     We only moved once when I was ten. We moved about 15 minutes away and in the same county. As an adult, though, I've moved a considerable amount more. I currently live in my fifth city and we're looking to move again in the future. I see moving as an adventure and opportunity to experience different places and people. Fun times! :)

How would you answer this week's Five Question Friday? Leave your responses in the comment section below! Have a good weekend! :)

Linked up at: 

        -*-*-*-*-*-*-*-*-*-*-*-*-*-*-*-*-*-*-*-*-*-*-*-*-*-*-*-

Thursday, September 20, 2012

Good Morning Girls Group

   
      Good Morning Girls is an organization/webpage which assists groups of ladies to join together in Bible study. The heart is for us to encourage one another in our faith and in being in the Word daily. This is accomplished by each group determining the best form of communication (email, text, Facebook etc) to discuss what she has read and learned in her daily quiet times. The format promoted at Good Morning Girls is S.O.A.P.:
S= scripture read or verse(s) that stood out to you
O= Observations about the passage or message
A= Application to your life
P= Prayer

     Any format of discussion could be used as effectively, though. The current session is on Colossians for eight weeks, and then there will be another session to prepare our hearts for the Christmas season. The official launch for the current session in Colossians was Sept. 17. However, there's never any fault for picking up in reading or studying God's Word at any point! We'll simply pick up where everyone else is.

     So, if you're interested in joining with other ladies in fellowship as we go through the book of Colossians, then please leave a comment with your email address or email me at revivinghomemakingblog (at) yahoo (dot) com. I hope we can get to know each other a little more and be a strong source of encouragement through this study!

        -*-*-*-*-*-*-*-*-*-*-*-*-*-*-*-*-*-*-*-*-*-*-*-*-*-*-*-


Sunday, September 16, 2012

Menu Plans (Fall!): Sept. 16-22


     This week I'm using recipes from my three favorite sources: Clean Eating Magazine, Eating Well Magazine, and Taste of Home. There is a pretty good mix of old and new recipes. I'm particularly excited to try the quinoa bowls, chicken divan and ...homemade Fritos! I really enjoy topping my chili with cheese and chips, but, of course, I'm reluctant to buy something like chips. If it can be made, then I'm going to try to make it homemade. The other homemade items are enchilada sauce and tortillas. Both of those items store easily in the freezer to make the present or future meal easier. Making extra of a meal component to store in the freezer is one way to make homemade foods a little more convenient to prepare. It will also save some money by limiting the items that are required to purchased. 

Breakfast
-homemade pumpkin sweet rolls with cream cheese icing (original recipe that will be posted soon)
-parfaits (yogurt, walnuts, fruit, granola)
-omelet (eggs,diced bell peppers, diced onions, diced mushrooms), toast, fresh smoothie/juice
-granola cereal with dried berries, banana 
-oatmeal, walnuts
-egg sandwich (egg, cheese, canadian bacon, biscuit)  {Tip: make these in advance and keep them in the freezer)

Lunch
-Roasted chicken, spinach and orzo
-Beans & rice (Saute onions, celery & bell pepper. Cook beans in broth (plus bay leaf). Cook rice on the side. Combine everything together)
-Chicken enchiladas (homemade tortillas, chicken, enchilada sauce and cheese. Roll up and place in casserole pan. Spoon extra sauce and cheese across tops. Bake until cooked through)


Dinner
-{breakfast for dinner} omelet, bacon
-Club salad (salad greens, toasted almonds, bacon, tomato, cucumber, avocado, raisins, cranberries, cheese with homemade honey mustard dressing)
-Chili (leftovers)

Snacks
-fruit (pears, bananas)
-olives, cheese slices
-yogurt
-veggies (broccoli, celery carrots etc)
-homemade bread (Challah)


Linked up at: 

        -*-*-*-*-*-*-*-*-*-*-*-*-*-*-*-*-*-*-*-*-*-*-*-*-*-*-*-


Tuesday, September 11, 2012

Menu Plan: Summer (Sept. 9-15)


     This week I'm mixing some familiar recipes with some new ones. I will be focusing on making a ham the central component by using this one ingredient in three meals. Several of the other meals involve ingredients we already have on hand.  Using one main component three ways and working from a basic pantry are two ways in which we can make real food with a real budget. We have about 15 different meals and 4 snacks planned for this week. The total for groceries this week was only $43! That amount divides out to about $6.14 for three meals for two people each day! Not too shabby, if I may say so myself :) 

Breakfasts
-parfaits (yogurt, walnuts, strawberries, granola)
-omelet (eggs,diced bell peppers, diced onions, diced mushrooms), toast, fresh smoothie/juice
-granola cereal with dried berries, banana 
-oatmeal, strawberries, walnuts
-egg sandwich (egg, cheese, canadian bacon, biscuit)  {Tip: make these in advance and keep them in the freezer)


Lunch
-Ham, green beans, sweet carrots
-Mini turkey burgers with sweet potato fries
-Blackbean tofu burritos, pico de gallo
-Plantation Ham
-Ham primavera

Dinner
-{breakfast for dinner} Idaho Sunrise (one of my favorite breakfasts!)
-Curried butternut squash soup
-BBQ tofu sandwiches, freezer slaw, baked beans (we didn't get to this one last week)
-Fish with baked potato fries
-Caesar salad (romaine, herbed croutons, Parmesan cheese with homemade caesar dressing)

Snacks
-fruit (watermelon, apples)
-olives, cheese slices
-yogurt
-veggies (broccoli, carrots)


Linked up at: I'm an Organization Junkie, Time-Warp Wife, Far Above Rubies, Growing Home, Thankful Homemaker, A Pause on the Path, Beauty and Bedlam, Cornerstone Confessions, Women Living Well, A Wise Woman Builds Her Home, Deep Roots At Home, Raising Homemakers, We are THAT Family


        -*-*-*-*-*-*-*-*-*-*-*-*-*-*-*-*-*-*-*-*-*-*-*-*-*-*-*-

Monday, September 10, 2012

Managing a Small Kitchen


      After having lived in and looked at many apartments, I've come to the conclusion that the designers must expect apartment dwellers to eat out instead of cook. The typical apartment kitchen is unreasonably small! My husband and I, however, spend a considerable amount of time in the kitchen preparing meals. For us, the first room we look at in a unit is the kitchen. Our requirements are that it must be open on at least two sides (closed on three results in a very hot environment with little ventilation) and enough counter top space to house our oversized stand mixer and microwave as well as provide adequate working space. As far as storage is concerned that is where we are more flexible by allowing creativity to make up for limitations. The following is a few ideas for how to manage in a small kitchen. If you're working with a larger space, then some of these ideas may not be appropriate for you.  As part of the Home Sweet Apartment Series, though, we're focusing solely on small kitchen solutions. 

1) Determine Your Most Necessary Tools
      There are an exaggerated number of kitchen gadgets and tools. Many of these items are single purpose and can be replace by a simple knife. When selecting kitchen tools, select items which will either be used a lot or can be used for multiple purposes. I recently determined that the inner basket of my salad spinner (an item we use weekly) doubles as a colander, thereby eliminating the need to have both of theses items. Another example is our mandolin that has multiple blades for multiple cutting purposes. I originally had a box grater and another smaller grater, but then decided that the mandolin could accomplish the same result. I now just have the one tool instead of three. Instead of a large drying rack, I simply spread a towel across the counter on which to set the clean dishes to dry.  As you work more and more in your kitchen you'll discover which tools are important for your cooking and which can be excluded. 
     Of the tools you do have, choose a collapsible option whenever possible. The ability of an item to collapse has become one of my favorite features. There are more and more items being produced with this space saving feature in mind. They may be a little pricier upfront, but not near as expensive as having to pay extra rent to have extra space just for storage. 
Collapsible Produce Keeper
                    
                              Collapsible Cake Carrier

Collapsible Prep Bowl Set

     Large 3-Compartment Eco Silicone Collapsible Lunch Box


2) Create Counter Top Space By Simply Clearing It Off
        Counter top space is so valuable! Not only does items left sitting out decrease your working space, but it also creates visual clutter causing your kitchen to look even smaller. Chose the items that you cannot move easily to store elsewhere (stand mixer, microwave etc) to leave out. There are also items like spice racks, utensil holder, knife block and canister sets that are typically seen on the counter tops. There are a couple of things to keep in mind when displaying these items. For instance, spices will remain fresher longer in cooler, darker spaces. The kitchen environment can be a sticky, greasy place and so utensils are ideally best kept covered. As far as canister sets go, there is usually not so great a kitchen space that pulling them out of a cabinet is too inconveniencing.  Nonetheless, if you use it often, like it a lot, or the other cook in your home enjoys it's place on the counter then select a couple of your most used items and limit the display to those.

3) Maximize Freezer Space With Storage Systems
         You can read more on my organization system for maximizing freezer space in a previous post, but I will try to offer a small bit of that again. I really enjoy having a wide variety of items in my freezer. I also enjoy not having to dig for it when I need it. One way that we make a small freezer work is that we don't have bulky boxes of prepared food to store. I freeze everything flat in measured serving portions in pint bags. Since there is only two of us in our family, each pint bag contains only two servings of meat, vegetable, soup etc. Because the bags are flat once frozen, then stack upright nicely in the two-tiered sliding basket  system. I simply grab the item I need when I need it and have no worries about digging or thawing too much. Items that don't store flat are kept in the middle with a shelving rack. Lastly, I turned off the automatic ice maker and removed the bucket in preference for much smaller ice trays.                                                                                              
                                       
4) Get Creative With Storage
         Our home canned items are stored on top of the cabinets. They are up and out of the way while still fittingly displayed. The cabinets on the opposite side store our empty canning jars. A word of caution for this storage solution is that cabinets can fall so be careful with putting too much weight up there. 
          You can also use the space on top of the refrigerator for storage. Choose more attractive displays than cereal boxes, though. We keep one of our produce bowls there and a decorative basket that is used to house extra placemats, aprons, and pot holders. 
          Lastly, kitchen items don't have to be kept entirely in the kitchen. If you have a dining room, then it's perfectly appropriate to use that space as well. A cubed storage shelf or bookshelf nicely decorated with your extra napkins, drinks, dry goods etc. is a great addition to the room. Plus, the top surface can be used to sit coffee or tea pots or as a service area for guests (snack bar, desert bar etc). If you're really squeezed for pantry space in the kitchen itself, then use a full size bookshelf unit and clear, labeled jars for your dry goods. The key to keeping it from looking cluttered is to make it a decorative display in addition to storage, and maintain a cohesive look between the items. 
Take advantage of open spaces like above your sink. I have a piece of elastic that I can string across to clip bags to dry, a verse or word of encouragement to read over as I wash dishes, or a recipe card to reference while cooking. When not needed, I can simply slip the line off the hooks on each side and place it out of sight. 
5) Limit Your Pantry
        Our pantry looks rather bare in comparison to some, but we have everything we need to prepare two to three full meals each day. We do this by limiting our pantry to the basics: sugars, flours, oats, cornmeal, grits/polenta, cornstarch, pastas ect. We buy mostly fresh foods, and then create from scratch anything else we need. The result is our entire pantry cummulatively fitting on about five small shelves (including spices). Since we cook a lot from scratch we don't limit ourselves in having a large selection of spices. We have a three tier shelf and two swivel shelves for all our spices.  The swivel shelves are fabulous because they utilize vertical space and swing out so that I have easy access to everything. The larger packaged items are stored on the tiered shelf to the left. 
       While we're discussing the pantry, I have really enjoyed having labeled containers for items I keep on hand at all times. They are uniform in size and easily stack which are so valuable in small spaces. Setting up a pantry with containers can be expensive, however. Keep in mind that you don't have to go out and buy every container for every item at once. In fact, it's wiser to wait a bit to learn what you use enough to keep and how much of it you will want to keep. There are actually a handful of items in my pantry that are on the waiting list for containers. It's okay to organize piece by piece, and when you're working through establishing steady financial ground this is precisely what you want to do. Add a piece when you can and in the meanwhile enjoy what's already there.     


Read Other Posts in the Home Sweet Apartment Series:
*Homemaking While Apartment Living: Part 1Part 2
*Concepts For Small Space Living
*Floral Wreath Tutorial

Linked up at: A Mama's Story, The Alabaster Jar, Homestead Revival, The Better Mom, What Joy Is Mine, The Modes Mom Blog, Covered in Grace, Raising Arrows, Time-Warp Wife, Far Above Rubies, Thankful Homemaker, A Pause on the Path, Cornerstone Confessions, Women Living Well, A Wise Woman Builds Her Home, Deep Roots At Home, Raising Homemakers, We Are THAT Family


*Note:The product links and images above may contain affiliate links to Amazon.com. Reviving Homemaking is an affiliate of Amazon.com, and as such receives compensation for each purchase made through the links.  

        -*-*-*-*-*-*-*-*-*-*-*-*-*-*-*-*-*-*-*-*-*-*-*-*-*-*-*-